Christmas Plaques
 As usual the students and teachers at
our school created Christmas gifts for all the families on
our colony. This year's idea came from the Facebook page of my friend,
Candice Cancade. Hers is much more elaborate than our simplified
version.
As usual the students and teachers at
our school created Christmas gifts for all the families on
our colony. This year's idea came from the Facebook page of my friend,
Candice Cancade. Hers is much more elaborate than our simplified
version.For the backboard, we used 1" x 4" board which were planed down and cut into the required lengths. Joy - 16", Love & Noel - 20" and Peace - 24". The letters were cut on our C & C router by my brother James. The older students and their teacher, Robert did most of the work: painting the letters and edges of the boards and gluing the letters in place. Linda took on the decorating duties.
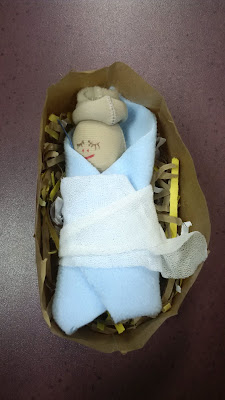 Baby Jesus Craft
I found the idea for this project at Baby Jesus Craft. I wasn't able find the specified baby socks, so I ended up sewing stretchy fabric into 6 inch long cylinders so they're about the size of baby socks. On the sides of the paper bag we glued labels reading "The best gift is Jesus" and "Es besta Tschenk is es Jesulein." 
We kept them at school for several days and whenever the kids had spare time, they enjoyed pulling them out and playing with them.


